China Top What Are Common Solar Panel Installation Mistakes?

Time:2026-10-20 Author:Sophia
0%

Solar energy promises lower electricity bills, cleaner power, and greater household resilience. Yet successful results depend on more than choosing efficient panels. The roof, wiring, mounting system, inverter, and local conditions must work together safely. A beautiful array can still perform poorly when installation details receive too little attention.

Many homeowners ask, “what are common solar panel installation mistakes?” Typical problems include inaccurate roof measurements, ignoring afternoon shade, weak mounting points, poor cable management, and incorrect panel orientation. Water may enter through badly sealed roof penetrations. Loose connectors can create heat and reduce system reliability. A small error can become an expensive repair.

Experienced solar professionals inspect roof age, structural strength, drainage paths, and nearby trees before installation. They also verify equipment compatibility, grounding, monitoring, and electrical protection. Clear documentation matters, including production estimates and maintenance guidance. However, no checklist catches everything. Even skilled teams can overlook a cable exposed to sharp metal or a shadow that appears only in winter. That possibility deserves honest attention.

This guide examines practical installation risks from planning through commissioning. It focuses on lessons learned from real rooftop conditions, not only manufacturer diagrams. Readers will find warning signs, quality checks, and questions worth asking an installer. Careful preparation may take more time. It usually prevents larger problems later.

China Top What Are Common Solar Panel Installation Mistakes?

Assess Roof Load, Shading, and 1,000 W/m² Solar Irradiance

China Top: What Are Common Solar Panel Installation Mistakes?

A frequent mistake is treating the roof as an empty platform. Before installation, check its age, structure, slope, and drainage paths. Solar modules and mounting hardware add permanent weight. Snow, wind, and maintenance loads add more. A structural professional should verify the roof’s capacity, especially on older buildings. Do not rely on a quick visual inspection. It can miss weakened rafters or hidden water damage.

Shading requires more than checking the roof at noon. Observe shadows in the morning, afternoon, and different seasons. Chimneys, parapets, trees, and nearby buildings can reduce energy production. Even partial shade may affect several connected modules, depending on the system design. The 1,000 W/m² figure is a testing reference, not a daily guarantee. Actual sunlight changes with clouds, heat, dust, roof direction, and local weather. Designing only from that number can create unrealistic output expectations.

Tips: Request a roof-load assessment and record shading at several times. Keep drainage and service paths clear. Compare estimated production with local solar data, not only laboratory ratings. Leave room for future roof repairs. I have seen plans that looked efficient but ignored access around vents. That mistake is easy to repeat. A careful site survey usually costs less than correcting unsafe mounting or disappointing performance later.

Size PV Arrays for 15–22% Module Efficiency and Local Energy Demand

Many solar installation mistakes begin with an oversized or undersized PV array. Module efficiency alone does not determine the correct system size. The Fraunhofer ISE Photovoltaics Report 2024 shows that commercial crystalline-silicon modules commonly deliver about 20–23% efficiency, while older modules may remain near 15–18%. Therefore, designers should model both ranges when replacing equipment or comparing quotations.

Local energy demand matters more than a generic national average.
The IEA PVPS Trends in Photovoltaic Applications 2024 reports continued rapid global PV growth, but generation still depends heavily on local sunlight and system conditions. Use monthly electricity bills, roof orientation, shading, and local irradiation data. A practical estimate is annual demand divided by expected annual yield per kilowatt. Then apply a realistic loss allowance for temperature, wiring, dust, inverter conversion, and battery charging. NREL’s PVWatts guidance commonly models these losses separately rather than hiding them inside module ratings.

Do not copy a neighbor’s array size. A 6 kW system may suit one home and overload another grid connection. For a roof with limited space, 22% modules can produce more power per square meter than 15% modules. Yet higher efficiency does not automatically mean better value. Check winter demand, export limits, and future loads such as heat pumps. I would also recheck the estimate after one year of bills. Real roofs are messier than spreadsheets.

Avoid Wiring and Inverter Errors Above 98% Conversion Efficiency

China Top: What Are Common Solar Panel Installation Mistakes?

Keeping inverter conversion efficiency above 98% requires more than selecting efficient equipment. NREL’s PVWatts documentation commonly models inverter efficiency at 96%, showing how quickly headline ratings can mislead. Peak efficiency is not continuous efficiency. High temperatures, low voltage, and partial loading can reduce real output.

Loose terminals are a frequent wiring mistake. A poorly tightened connector creates resistance, heat, and gradual energy loss. Reversed polarity can also damage equipment during commissioning. Installers should verify polarity, insulation resistance, cable size, and torque values with calibrated instruments. Small details matter.

Cable routes need attention. Long, undersized conductors can cause unnecessary voltage drop before power reaches the inverter. IEA PVPS Task 13 reports that shading, soiling, mismatch, and downtime remain important sources of photovoltaic performance loss. The inverter should operate inside its recommended voltage and current ranges, not merely start successfully.

On real rooftops, labels sometimes fade, cables rest against sharp edges, and unused connectors remain exposed. These issues are easy to overlook. I would not call a system successful because its screen shows 98% for one afternoon. IEC 61724-1 recommends structured performance monitoring, including energy yield and system availability. A better check compares expected and measured output across different weather conditions. Even careful teams miss one detail occasionally. That is where independent inspection helps.

Install Modules at Proper Tilt and Allow 10–15% Ventilation Clearance

China Top: What Are Common Solar Panel Installation Mistakes?

Module tilt and airflow are often treated as minor details. They are not. A flat-mounted panel can collect more dust, shed water poorly, and lose output during hot afternoons. In many regions, a tilt close to local latitude is a useful starting point, but roof structure, wind, shading, and drainage still matter. The best angle is not always the textbook angle.

Leave 10–15% ventilation clearance around the array where the design allows it. Keep a continuous air path beneath the modules, rather than blocking it with insulation, cable loops, or oversized rails. Fraunhofer ISE’s Photovoltaics Report identifies typical crystalline-silicon temperature coefficients near −0.3% to −0.5% per °C. Heat reduces voltage. A tight roof fit can quietly increase that loss.

The 10–15% figure is a planning guide, not a universal code requirement. Local engineering rules must control the final design. NREL’s PVWatts documentation also treats module temperature as a major performance input. Installers should check roof measurements, midday shade, wind exposure, and drainage before fixing rails. A visually tidy layout may still be thermally poor. That is the part worth questioning.

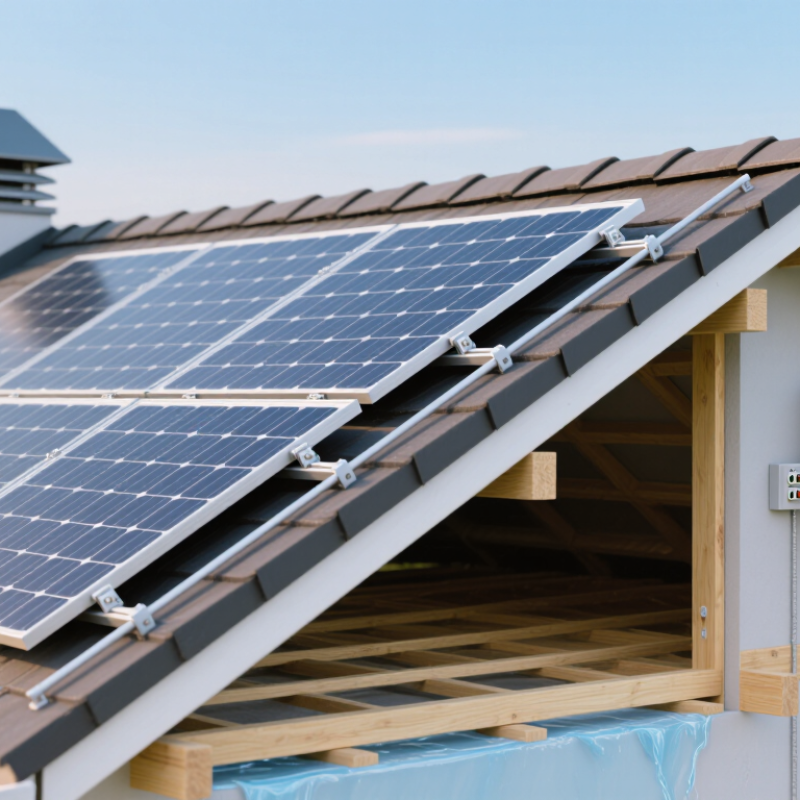
A fixed solar array is commonly designed with a tilt angle close to the installation site's latitude as a practical starting point. The values shown are representative design guidelines rather than universal requirements; roof structure, shading, weather, and seasonal energy demand should also be evaluated. Leave approximately 10–15% ventilation clearance around the module area to help airflow and reduce heat buildup.

Verify Grounding, Commissioning, and 1% Annual Degradation Limits

Common solar installation mistakes are often hidden beneath clean panels and tidy cable runs. Grounding is not a box-ticking exercise. Inspectors should verify bonding between module frames, mounting rails, inverter enclosures, and the grounding electrode. Loose lugs, painted contact points, and undersized conductors can create unsafe voltage paths. IEC 62446-1 recommends documented verification, including polarity, insulation resistance, protective conductor continuity, and operational testing. A missing commissioning record is a warning sign.

Commissioning should include torque checks, inverter settings, string measurements, and thermal inspection under stable sunlight. Small errors matter. A reversed connector may remain unnoticed until production drops. The process is rarely perfect, and rushed handovers deserve a second review. Testing results should include date, weather, instruments, calibration status, and corrective actions.

Annual degradation also needs careful wording. NREL’s Photovoltaic Degradation Rates report found a median degradation rate near 0.5% per year across reviewed systems. Therefore, a 1% annual limit can serve as a conservative contractual alert, but it is not a universal performance guarantee. At 1% yearly degradation, a system retains roughly 78% of its initial output after 25 years. Independent data logging, weather normalization, and calibrated meters are essential before blaming the modules. Dirty surfaces, shading growth, inverter downtime, and inaccurate sensors can imitate degradation.

FAQS

What should be checked before installing solar panels on a roof?

Check the roof’s age, structure, slope, and drainage paths. Panels and mounting hardware add permanent weight. Snow, wind, and maintenance add more load. A structural professional should inspect older roofs. A quick visual check can miss damaged rafters.

How should roof shading be assessed?

Observe the roof in the morning, afternoon, and different seasons. Check chimneys, parapets, trees, and nearby buildings. Even partial shade can reduce several connected modules’ output. Record shadow locations with photographs or simple site notes. Noon-only checks are incomplete.

Does 1,000 W/m² guarantee daily solar production?

No. The figure is a testing reference, not a daily promise. Clouds, heat, dust, roof direction, and weather change actual sunlight. Compare estimates with local solar data. Laboratory ratings can create unrealistic expectations.

How can a suitable solar array size be estimated?

Start with monthly electricity bills and expected local solar yield. Consider roof orientation, shading, and available installation space. Include losses from heat, wiring, dust, inverters, and batteries. Future loads may include heating equipment or vehicle charging. The estimate may need revision after one year.

Is a higher-efficiency module always the better choice?

Not necessarily. Higher-efficiency modules produce more power per square meter. They can help when roof space is limited. However, price, warranty terms, local conditions, and energy demand still matter. More power is not automatically better value.

Why should installers avoid copying a neighbor’s system size?

Homes have different energy use, roof space, sunlight, and grid limits. A system suitable for one home may exceed another connection’s limits. Review winter demand and possible future loads. A nearby roof is only a rough comparison. It can mislead.

What commissioning tests should a solar system include?

Commissioning should include torque checks, inverter settings, and string measurements. Inspect grounding connections between frames, rails, enclosures, and the grounding electrode. Test polarity, insulation resistance, protective conductor continuity, and operation. Record the date, weather, instruments, calibration, and corrective actions. Keep the report.

How should annual solar degradation be evaluated?

A 1% annual limit can serve as a conservative warning threshold. It is not a universal performance guarantee. Some reviewed systems showed median degradation near 0.5% yearly. After 25 years, 1% yearly degradation leaves roughly 78% output. Check shading, dirt, downtime, and sensor accuracy before blaming modules.

Conclusion

Understanding what are common solar panel installation mistakes is essential for achieving safe, reliable, and efficient system performance. Before installation, assess the roof’s structural load capacity, identify shading from nearby objects, and consider the site’s solar resource, often referenced at 1,000 W/m² under standard test conditions. The photovoltaic array should be sized according to local electricity demand and realistic module efficiency, generally around 15–22%, rather than relying on theoretical output alone.

Installation quality also depends on correct wiring, compatible components, and an inverter capable of conversion efficiency above 98% under suitable operating conditions. Modules should be positioned at an appropriate tilt for the location, with approximately 10–15% ventilation clearance beneath them to reduce heat buildup. Finally, installers should verify grounding, complete commissioning checks, and monitor performance over time, allowing for a normal annual degradation rate of about 1%. Careful planning and inspection can prevent avoidable losses and extend system service life.

Sophia

Sophia

Sophia is a dedicated marketing professional with an exceptional depth of knowledge about her company's products and services. With a keen understanding of market trends and customer needs, she crafts insightful blog posts that not only inform but also engage readers, enriching the company’s online......